One of the easiest ways to jazz up your client's Niagara installation is a custom login screen. This may seem like a small detail at first glance, but it's very important because:
- The login screen is your user's first impression of the system. Familiar branding will help make it a good one.
- Seeing their company's logo on your work gives clients an instant sense of ownership – it feels like their system, not someone else's.
- Your clients' brand matters to them, so it should matter to you. If you've read our blog before you'll know that we've written extensively on why branding matters – if you haven't check out our articles on interface and design.
There are tons of additional reasons why you should customize the login screen for all of your projects, but you wouldn't have read this far if you weren't convienced so let's get to it.
Update – October 2020
If you want full control over the look and feel of your Niagara 4 login, you should check out a new free tool we just released called Domo. See our blog post for details.
First, you need the logo
If you're not sure how or where to find a good quality logo, be sure to read our post about how to be a good steward of your client's brand. It should have all the info you need on who to ask and what to say.
Stop right there – do not go to Google Image Search and search for your client's name. That is a surefire way to get a version of the logo that is of terrible quality or, even worse: outdated or incorrect.
Ask your client or their marketing team for a high quality logo file – they'll appreciate your attention to detail and it shows that you care.
A few tips for your logo file
- It should be of type JPG or PNG. If you were provided an SVG or AI file you can convert it using Sketch, Photoshop, Gimp, or a free online converter.
- It shouldn't be much wider than 350 pixels. Images wider than that will cause the login form to stretch and icon of the two keys will be (very noticeably) too far away from the text fields
Niagara Setup
Connect to your station in Workbench and follow the steps below.
Step 1. Get your logo file in to the station
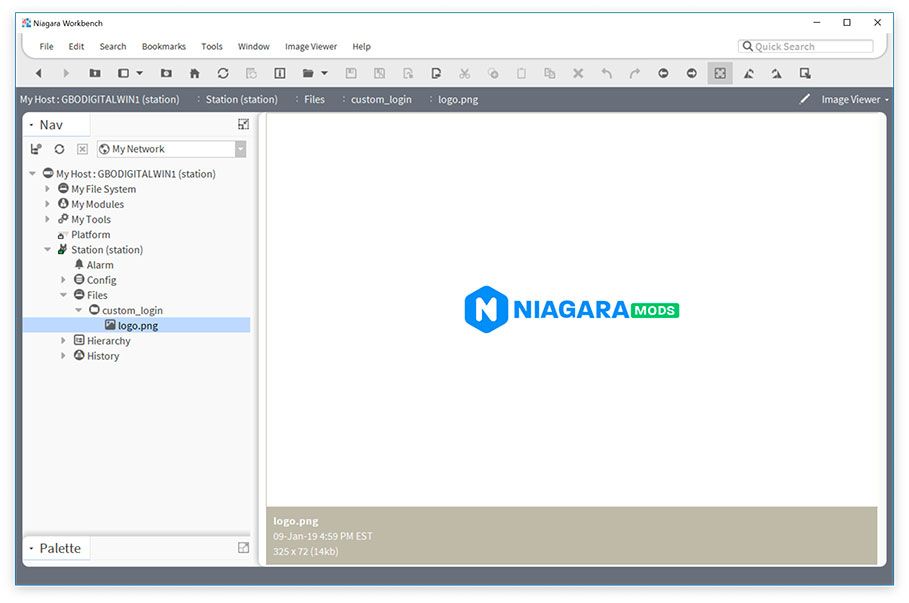
We're going to be putting the file in the station's file system. I typically make a new folder called "custom_login".
- In the Nav Tree, expand "My File System" and browse to where your logo file exists on your computer. Right-click, and copy it.
- In the Nav Tree, expand the Station tree, and then expand the Files tree. Right click on Files and go to New > New Folder. Give your folder a name (I'm using "custom_login").
- Right-click on your newly created folder, and go to Paste. You should see your logo file in the folder if you expand it.
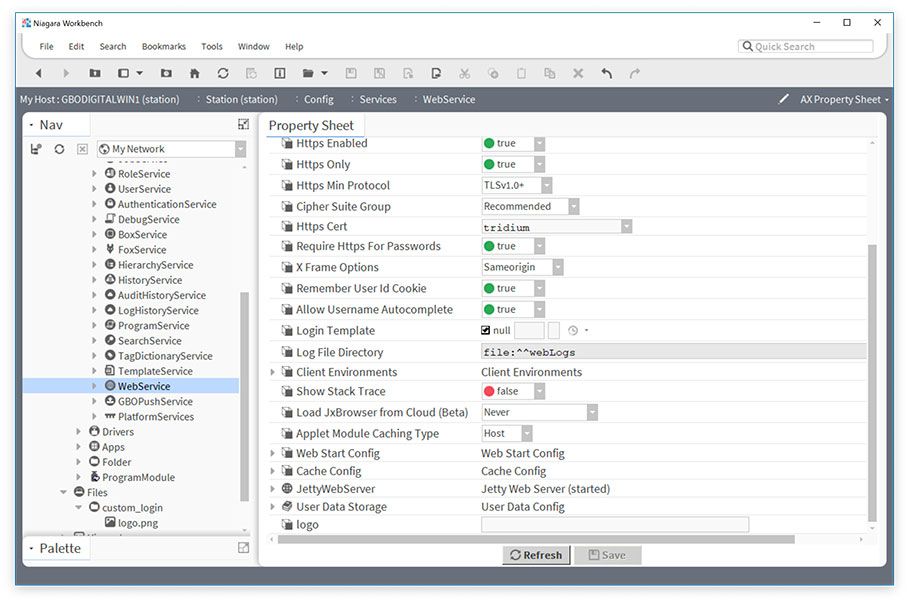
Step 2. Create a custom logo slot on your WebService
We have to tell Niagara that we want to use a custom logo and where our logo file exists. We do this by adding a slot on the WebService.
- In your station's Nav Tree, navigate to Config > Services. In the list of services find the WebService and right click on it and a menu will appear. Go to Views > AX Slot Sheet. You should see a table of slots load on the right.
- Move your mouse to the table and right-click to bring up the menu. Go to Add Slot (you can also just press Cntrl+A to add a slot)
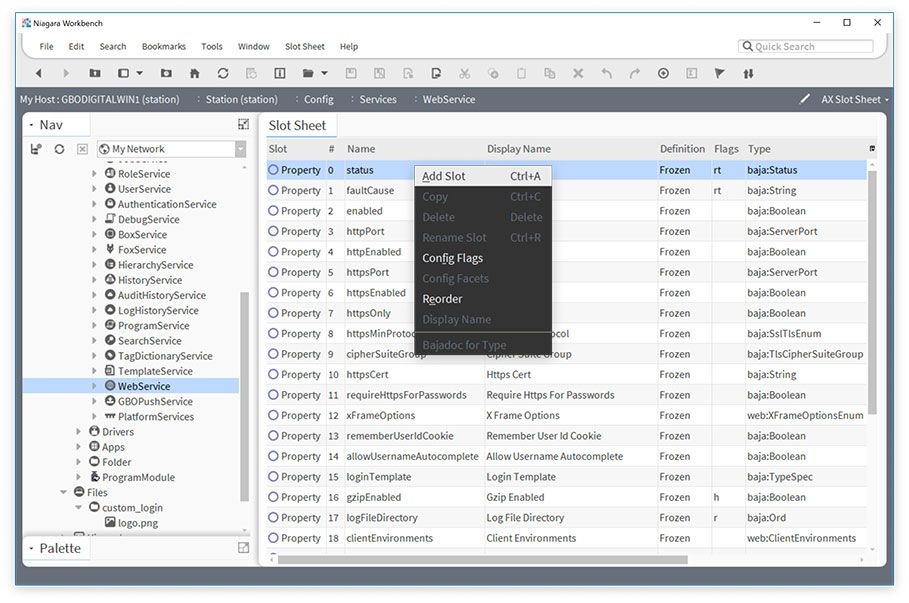
- In the dialog box that appears, enter the name
logo. This is important – it must be called logo or Niagara will not know this is your custom logo slot. Verify that the Type dropdowns are set to baja and String. Then click the OK button.

- Verify that your new logo slot was created by scrolling to the bottom of the slot list and looking for it in the table.
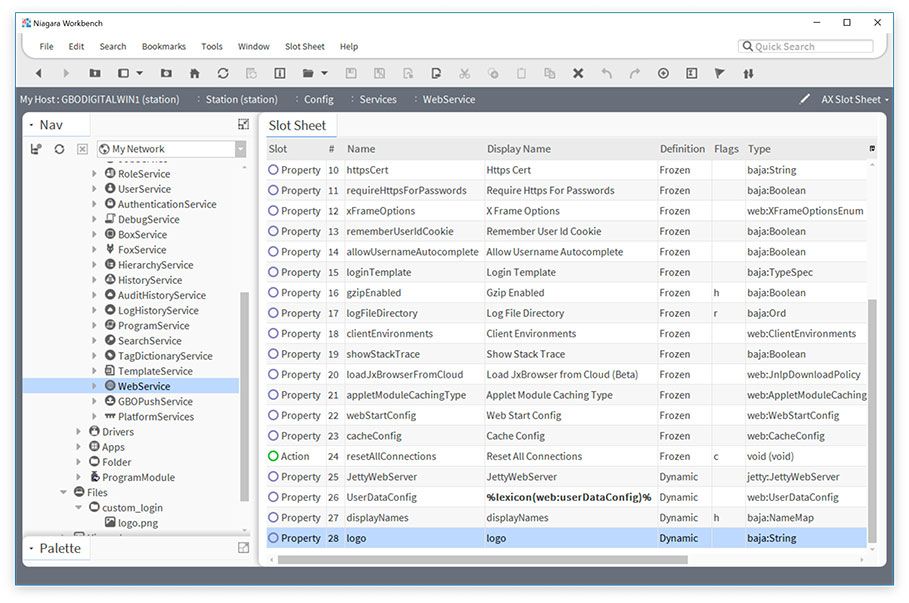
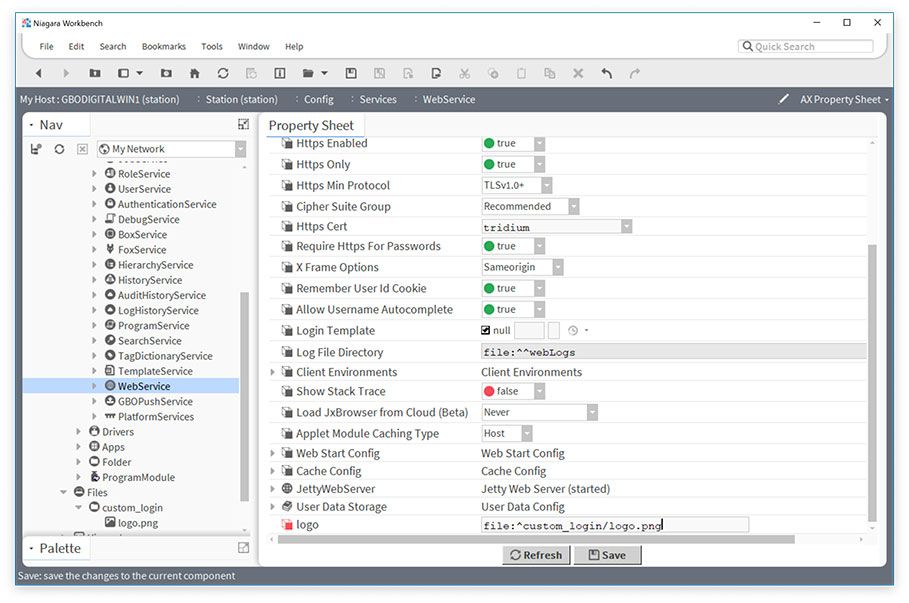
Step 3. Setting the path to your logo file
Now that your slot has been added to the WebService, you can set the value to your the path of your logo file.
- Open the WebService AX Property Sheet (double click the WebService in the Nav Tree or right-click the Web Service and go to Views > AX Property Sheet)
- Scroll down and find the logo property, it will probably be at the bottom
- Enter the ord of your custom logo in the textbox. It should start with
file:^and then continue as the full path to the logo file in your station.
If you were following along and put your logo file in a folder named "custom_login" the full value would befile:^custom_login/logo.png - Click the Save button at the bottom of the view and you're done!
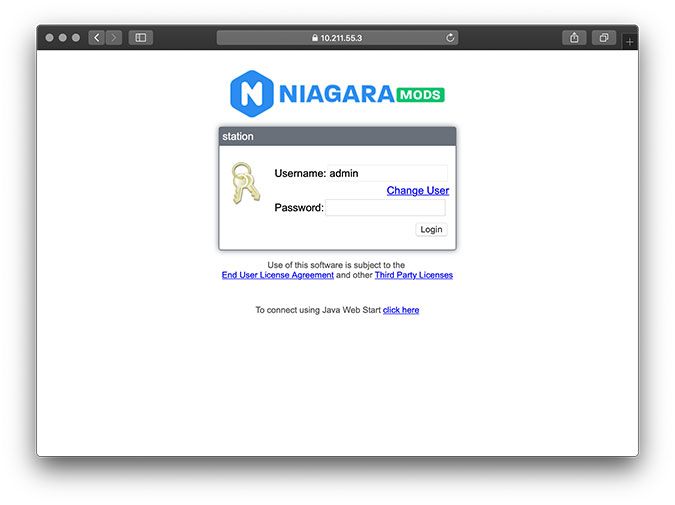
Testing it out
Visit your station in your browser and you should see your newly added logo at the top of the login screen. You can always make adjustments to the logo size and just replace the file in your station if something looks off. Here's how mine turned out:
If you notice that your logo is too small or too large, you can resize it using an image editor like Sketch, Photoshop, or Gimp. There are also free tools available online. Delete and replace your image in the station file system by repeating step 1 above. You shouldn't have to do step 2 or 3 again unless you've changed your file name.
Below is an example where I used an image file that was too wide. You can see that the spacing between the key and the username and password text boxes is awkward.

That's it!
I hope you enjoyed reading this article and that it helps you make your future Niagara login screens look awesome.
Adding a custom logo image only scratches the surface of what's possible. Look for an article coming soon about advanced customization where I'll show you how to change every single element on the page with CSS.
